


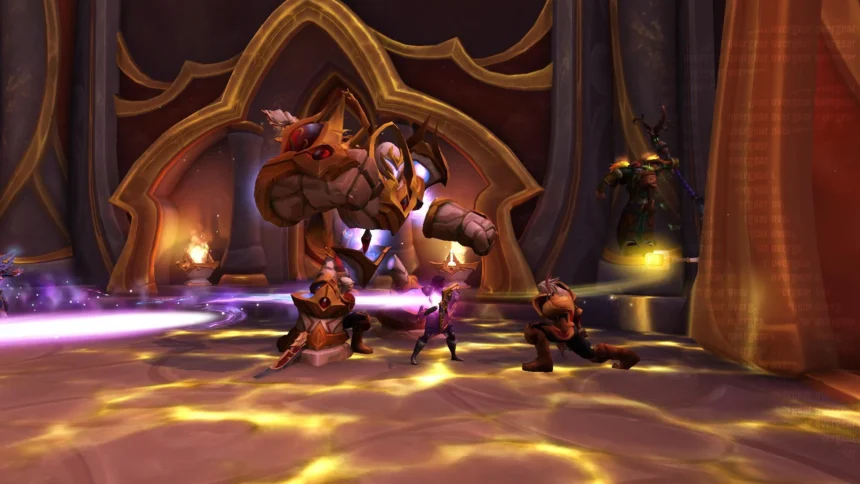
For a long time now, WoW’s endgame has pretty much been defined by the chaotic and ever-ramping challenge of Mythic+ dungeons. Over the years, every seasonal rotation has brought its own mix of nostalgic revamps and vertical dungeon designs that push even the tightest groups to their limits. While every season throws a barrage of massive trash packs and punishing bosses at us, certain dungeons stand out because their execution windows are incredibly tight, and the environments themselves are completely unforgiving.
Looking back at some of the most memorable maps to hit the keystone pool, three dungeons stand out as absolute tactical nightmares: the freezing quarries of Pit of Saron, the grand elven ruins of Windrunner Spire, and the vertigo-inducing, cloud-brushed ledges of Skyreach. Let’s be real, timing these keys takes way more than just focusing on your DPS rotation and trying to top the Details meter. Timing the key comes down to three things: landing your CC perfectly, nailing your line-of-sight positioning, and strictly following a well-optimized route. just focusing on your DPS rotation
1. Pit of Saron: A Nostalgic Frostbitten Nightmare
Originally introduced during the classic Wrath-era campaigns, the modern integration of the Pit of Saron into high-level keystones fundamentally alters how players approach environmental damage. The freezing terrain forces groups to continuously balance incoming physical damage with creeping magical debuffs that reduce movement speed and apply sustained damage over time. Let’s be real: between the brutal stuns and wipe-inducing line-of-sight mechanics, pugging this place on high keys is an absolute nightmare. It’s exactly why so many players turn to a WoW Mythic boost to knock out their weekly vault slot efficiently and move on to the content they actually enjoy.
Key Tactical Bottlenecks
- The Forgemaster Garfrost Line of Sight: The Forgemaster Garfrost Line of Sight: Garfrost throws two Ore Chunks at random players with Throw Saronite — DPS must place them centrally so the tank can easily access one. The tank must then position themselves so that the Ore Chunk intercepts Garfrost’s Orebreaker cast. The Ore Chunk absorbs the hit and is destroyed, protecting the tank from massive damage and an 8-second stun.When Garfrost reaches full energy, he channels Glacial Overload into the nearest forge: the entire party must hide behind the second (surviving) Ore Chunk to break line of sight. Failing to take cover during Glacial Overload results in an instant group wipe on high keys.Knowing that one misplaced boulder can instantly ruin your key, many players prefer avoiding the usual pug drama entirely. Instead, many players choose a wow mythic carry to clear Pit of Saron with an experienced group and make the most of their weekly lockout.
- Ick and Krick — The Second Boss: A dual encounter featuring a unique Scourge creature called a Notlikh (Krick) riding a massive plague construct (Ick). The primary mechanical priority is to interrupt Krick’s Death Bolt and quickly burn down the Shades of Krick before they detonate for massive group damage. Periodically, Ick will fixate on a random player; the targeted player must kite the construct strictly around the outer edge of the arena — never cut across the middle — otherwise, you’ll bait the boss’s cleave and drop deadly AoE pools right on top of the group.
- The Ice Cave Gauntlet: The ice cave tunnel between Ick & Krick and the final boss is the most demanding non-boss segment of the run. Standard trash archetypes reappear here alongside the Glacieth mini-boss. Avoid mounting in the gauntlet — you lose reaction time to dodge falling ice and incoming casts. Keep the group moving together and coordinate interrupts through to the end. A WoW m+ boost pairs you with an experienced group that knows the optimal pacing and routing for every pull
- Scourgelord Tyrannus Kiting: The key mechanic is Scourgelord’s Brand: Tyrannus knocks the tank back and immediately leaps to their landing position, dealing a massive AoE slam. The tank must use a defensive on the initial hit and quickly move out of the leap zone. Additionally, Tyrannus periodically commands Rimefang to cast Blizzard, which freezes the nearby Bone Piles. When Tyrannus reaches full energy, he casts Army of the Dead to raise adds from any active Bone Piles. The tank must strategically position the boss so that Rimefang’s frost abilities freeze at least 4 out of 5 Bone Piles, preventing the adds from spawning. Any remaining adds that do manage to spawn must be killed instantly, as their Plague Bolt stacks will quickly overwhelm the group on high keys.
Pit of Saron: Core Encounter Mechanics
| Boss / Trash Pack | What Kills You (Mechanic) | How to Handle It (Strategy) |
| Forgemaster Garfrost | Glacial Overload beam from the forge kills the group instantly if uncovered. | DPS place Ore Chunks centrally with Throw Saronite. Tank uses Orebreaker to destroy the first boulder while using a defensive to avoid the stun. At full energy everyone hides behind the remaining Ore Chunk to block Glacial Overload. |
| Ick and Krick | Shades of Krick explode for massive AoE if left alive; Death Bolt one-shots on Tyrannical weeks. | Both share health through Necrolink — maximize cleave. Kill Shades immediately. Interrupt Krick’s Death Bolt on cooldown. During Phase 2, kite Ick around the outer ring; never cut across the middle. |
| Scourgelord Tyrannus | Scourgelord’s Brand knocks tank back and leaps to their landing spot; Army of the Dead adds overwhelm the group if ignored. | Tank uses a defensive on Scourgelord’s Brand and immediately moves out of the follow-up leap landing zone. Kill adds from Army of the Dead quickly — prioritize Plaguespreaders before they stack Festering Pulse on the group. |
2. Windrunner Spire: High-Altitude Spatial Coordination
Windrunner Spire is a dungeon set in the Midnight expansion, located in Eversong Woods. Inside, players will face a gauntlet of four bosses: Emberdawn, the Derelict Duo, Commander Kroluk, and finally, The Restless Heart. Soul Conduit teleporters return the group to the central hub after each kill, where a new path opens toward the next encounter.
Interrupt management is the dungeon’s core challenge throughout. Multiple trash types cast dangerous abilities that wipe the group if left unchecked — assign kick priorities before every major pull.
Windrunner Spire: Core Encounter Mechanics
| Enemy / Threat Zone | What Kills You (Mechanic) | How to Handle It (Strategy) |
| Emberdawn (Boss 1) | Flaming Updraft leaves unyielding fire patches on the floor, while Burning Gale constantly shoves players around throughout the intermission phase. | Stack all Flaming Updraft fire zones into one corner of the room to preserve movement space. Save major healing cooldowns for the Burning Gale intermission phase. |
| Derelict Duo (Boss 2) | Both bosses (Kalis and Latch) share a health pool; if one dies far ahead of the other, the survivor enrages. | Balance damage between both targets so they die together. Interrupt Kalis’s Shadow Bolt. Dispel Splattering Spew puddles away from the center of the room. |
| Commander Kroluk (Boss 3) | At 66% and 33%, Kroluk casts Rallying Bellow, becomes immune, and summons a wave of adds while Bladestorming through the room. | Burn the add wave immediately — Kroluk remains immune and Bladestorms until all adds are dead. Heal the party to full before each threshold. Keep the boss positioned for cleave onto adds. |
3. Skyreach: Peak Vertical Execution
Skyreach is the ultimate test of how well you know your positioning and how fast you can adapt to rapid boss mechanics. Located high above the clouds, this Arakkoa stronghold punishes poor spatial orientation more severely than almost any other dungeon in the Mythic+ rotation. Environmental platforming elements and strict positioning remain a core tool for testing player adaptation. Seriously, one slight misstep on the wind phase or a second of lag during the beam phase, and your entire party is flying off the platform. Because the margin for error is basically zero at high keys, more and more players opt for a WoW mythic plus boost to run alongside a coordinated team, hit their weekly score targets, and grab targeted loot without spending hours in the group finder
Critical Mechanics to Master
| Encounter / Zone | Primary Threat Mechanic | Optimal Counter-Strategy |
| Ranjit | Spinning Grip / Four Winds | Position Ranjit at the platform edge for maximum space. During Four Winds, dodge through the wind waves and use personal defensives — this phase spikes group damage sharply. Drop Spinning Grip zones away from the center. |
| Araknath | Energizing Beam & Burst (Stacking AoE damage) | This is a strict DPS race. Three solar beams channel into the boss, healing him. Players must step into the beams to intercept them, taking ticking damage but stopping the boss’s healing. Pop offensive cooldowns immediately at the start and bloodlust/heroism to burn the boss down before the party succumbs to the ramping Burst AoE damage. |
| Rukhran | Summon Solar Flare (Fixating add that explodes on contact) | Immediately slow and stun the Solar Flare add and burst it down before it reaches its target. Do not let it explode near the corpses of old adds, or it will resurrect them. Don’t sleep on the CC when it spawns—letting it get close to its target is a guaranteed group-killer at elevated key levels. |
| High Sage Viryx | Cast Down & Shield Constructs | Focus fire down the Solar Zealot instantly when a player gets gripped by Cast Down to prevent them from being thrown off the platform. Kill Shield Constructs immediately, as they make the boss immune to damage. Interrupt Lens Flare on cooldown. |
Skyreach is widely considered one of the hardest DPS-check dungeons in the Midnight Season 1 rotation. High Sage Viryx’s final platform becomes a tight, punishing environment at elevated key levels. Precise positioning, quick beam management on Araknath, and immediate switch to critical adds are what separate groups that time the key from those that don’t. It’s honestly a mechanical nightmare for random groups, which is why Skyreach has become one of the most popular choices for mythic boosting. Running it with a coordinated team means tighter execution on every platform phase, faster clears, and a reliable path to your weekly Keystone score.
Structural Gearing Paths and Modern Optimization
Whether you are pushing keys in historic Timewalking events or diving deep into the structural content updates of the Midnight expansion, character power remains strictly bound to your weekly vault choices and itemization tracks. Maximizing efficiency requires balancing your daily gameplay loop between raw progression and target-farming specific dungeon trinkets.
Streamlining the Weekly Grind
For many casual or mid-tier players, assembling a cohesive five-man group capable of clearing high-level keys within the strict time limits is incredibly difficult. This barrier to entry has naturally increased the popularity of professional mythic boosting structures. Relying on an experienced group allows players to focus entirely on learning optimal defensive rotations and studying layout patterns without the toxicity often found in random looking-for-group queues.
To optimize your progression flow, prioritize the following milestones each week:
- Complete at least one maximum-level keystone to unlock the highest available item-level tier inside the Weekly Vault.
- Focus your bonus currencies on upgrading targeted pieces of gear retrieved from complex instances like Skyreach or Windrunner Spire.
- Coordinate interrupt priorities with your party before initiating key trash pulls to avoid overlapping vital cooldowns.
Utilizing dedicated tools such as a tailored WoW mythic+ boost strategy can easily smooth out sudden progression plateaus, especially when trying to secure seasonal achievements like Keystone Master or Keystone Hero.
Maximizing Performance in Modern Mythic+
As the scaling factors of the Mythic+ system continue to evolve across patch cycles, the requirements for entering high-tier keys become more stringent. Survival depends on optimizing your build and keeping up with the rapid pace of dungeon progression.
- Strategic Interrupt Protocols: Always assign specific targets within high-density packs. Letting a single healing or shield cast slip through in Windrunner Spire can prolong a fight long enough to ruin a time-sensitive run.
- Coordinated Cooldown Usage: Do not hoard major offensive skills exclusively for bosses. High-tier groups find success by dropping all their major offensive cooldowns on massive trash pulls to melt down the most dangerous mobs instantly.
- Investing in Professional Assistance: If your schedule doesn’t allow for hours of daily grinding, securing a WoW m+ boosting package can reliably fill specific slots in your gear sheet, giving you the item level necessary to join higher-tier groups.
- Mastering Position-Dependent Mechanics: Whether hiding behind Ore Chunks during Garfrost’s Glacial Overload in the Pit of Saron or picking up Cast Down zealots in Skyreach, moving efficiently while maintaining your rotation is the defining trait of a skilled endgame player.
At the end of the day, dealing with old-school layouts like Pit of Saron alongside these new dungeons just takes patience, good positioning, and plenty of practice. Once you get a handle on the main mechanics and learn how to use a WoW m+ carry to get past those annoying gearing plateaus, you’ll be in a perfect spot to grab some high-tier loot and push the highest keys of the season.